Tips and Tricks!
Most digital photos are larger than 1MB in size, and have a pixel resolution greater than 1000 pixels on a side. But when printed at 300DPI, individual tiles typically do not need to be greater than 100 pixels on a side (since individual tiles are typically on the scale of 1/3rd of an inch tall/wide). Such images are typically on the order of 50KB in size, and take substantially less time to load than high-resolution images.
The process of generating a picture medley requires each tile to be loaded into memory twice: (1) to process into a tile so that it can be matched against each possible location in the medley, and (2) to render the image at its final location while saving the final high-resolution output.
Making the problem worse, you'll typically find that it takes a few tries to get the right combination of tile images and target image characteristics before you are happy with the result, and you'll spend a lot of time watching the progress bar while tile images are loaded.
The Library feature allows you to generate a collection of small image files that can be used in medley generation in place of the original files. No original photos will be replaced. To utilize this feature:
- Select the folders and files you'd like to use in your medley
- Choose the "Library" button
- Specify a folder where the library will be created. You can create a new folder if needed.
That's it. After a few minutes (maybe more if there is a large number of large files to be processed...) the library will be complete, and the "Source Images" list will automatically be updated to point to the location of the newly-created library.
For subsequent medleys derived from the same stock photos, you can use the "Add Folder" button to push the newly-created library to the "Source Images" list.
This varies somewhat with the size you plan to print your final medley, and the available range of viewing distance in the location of the print.
For example, if you are going to print an 8x10 and hang it in a hallway (where the farthest you can stand to look at the medley is only a few feet), you should select a very simple target image, probably a two or three-color logo or icon. But if you're going to hang the 8x10 at the end of a hall (where the farthest you can view the medley is 10-20 feet away), a more complex target image like a photograph can work well. This rule scales as the print gets bigger and the maximum viewing distance increases.
To summarize the general rules for what you're looking for:
- Contrast - this is why logos work well. If you're using a photograph, try manipulating the image first to increase the contrast and exaggerate the edges.
- Simple - if you're using a photograph, select one with very simple and obvious subject matter. Crop the image if necessary to trim away distracting or non-critical elements, or even replace the background with a neutral color like white or black (to exaggerate the edge of the subject).
- Rich colors - the algorithm selects locations for tiles based on color. If you're using a photograph, try manipulating the image to increase the saturation to exaggerate the colors.
By default, the software assumes that the minimum viewing distance is such that the viewer can get right up close to the print, hence the grid is defined to allow 3 images to an inch (or 9 per square inch).
But if the minimum viewing distance doesn't allow the viewer to get up close (for instance a large poster suspended on a high wall), the viewer would not be able to resolve 1/3rd inch images. If the medley was high-quality the viewer would probably think it was actually a posterization effect rather than a medley. In this case you might want the grid to allow the individual tiles to be 2 or 3 inches on a side. So for a poster 5 feet on the longest side, you might set "Tiles on Longest Side" to only 30 or 20 (for 2" tiles or 3" tiles, respectively).
You should also be aware that if the tile layout includes overlapping tiles, the software makes the tiles larger in order to maintain the same count of tiles on the longest side.
The software is designed to use each source image only once (if at all), as discussed earlier. So the minimum number of images required by the software is exactly the number of tiles in the grid. But providing the minimum number of source images does not typically produce optimal results, because the available source images rarely coincide with the colors and edges of an arbitrarily selected target image. There is no fixed rule, since there is no guarantee that a given collection of images will include any of the colors in a given target image. But as a general idea, try to come up with twice as many images as grid cells.
Providing exactly the number of source images needed will help to ensure that every source image is used, but the accuracy of the medley will probably suffer. The program uses the best image it can find for each tile in the medley, so if you provide more images than required, the quality of the final medley will be better, but there will not be any guarantee that any particular source image will appear in the final medley. (This is why tiles can be "pinned.")
If you have more source images than you need, try increasing the "Tiles On Longest Side" slightly, and try to reduce the number of source images by removing less interesting images from the list.
If you have fewer images than you need, you'll have to get more images. Either take more pictures or make "copies" of images until you have just enough. To save on disk space, create shortcuts to images rather than copies of them.
Picture Medleys are often generated with a theme in mind. Be sure to check the Themes page for some great examples!
- images of athletes on a sporting team which comprise the team logo or image
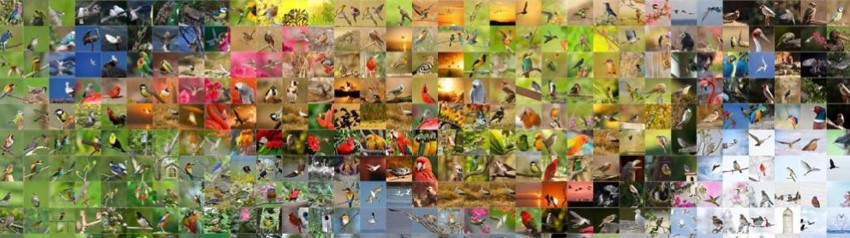
- images of nature (flowers, wildlife, landscapes) which comprise a logo or image
- images from a family vacation which comprise a logo or image from the vacation location
- images from an important event which comprise an important image from the event (e.g. product or logo)
The images on your hard drive are probably not organized in exactly this way, and it can be tedious to drag hundreds of individual files into the list. For this reason, the software includes the ability to follow Windows Explorer Shortcut Links. As you come up with themes for medleys, create folders for those themes, and drag shortcuts to appropriate source images into the folders. This lets you organize the original images according to date or location (or whatever other scheme you like to use), while keeping groups of related images together, and costs nothing more than what you already paid for Windows.
As an alternative to folders of shortcuts, there are a number of shareware programs available that help you index your image collection. Many are designed to allow you to drag images or groups of images from their UI into various Windows Explorer targets for the purpose of copying files, and this capability makes them compatible with PictureMedley as well.