PhotoSheet Creative Page Layouts
 PhotoSheet includes over 40 custom page layouts and improved composition abilities within any layout. This page provides an overview of the new capabilities and some examples to give you an idea of what's possible.
Padding and Rounding
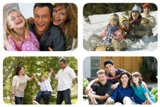 PhotoSheet includes the ability to shrink the images within a layout, creating space (padding) between the images! This gives you some creative freedom to include some border around the photos if you're trimming them for use as wallet photos or on scrapbook pages; or to separate the images if you're keeping them together on a single sheet. With the ability to put rounded corners on the images in the layout, you have even more creative freedom in your page layouts.
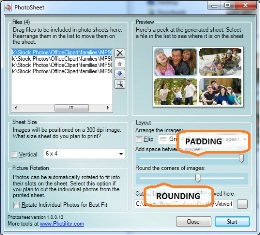 The amount of padding and rounding is selected using sliders as shown.
Padding
All the way to the left provides no padding; the images will be touching. All the way to the right is the maximum padding, about 1/40th of the minimum dimension of the final print (this means that on a 4x6 print the maximum padding is 1/10th of an inch; and since all of the images are reduced by this amount, you'll end up with 1/5th of an inch separating the images at the maximum padding).
On layouts where the image rectangles are already separated, increasing the padding simply increases the separation.
Padding can be predefined in custom layouts using the "padding" attribute described here.
Rounding
The amount of rounding is selected using a slider. All the way to the left provides no rounding; the images will have square corners. All the way to the right is the maximum rounding; the corners of the images will be rounded with a radius (the distance from the corner to where the rounding begins) of 1/10th of the minimum dimension of the final print (which means that on a 4x6 print, the maximum rounding radius is 4/10ths of an inch).
Rounding can be predefined in custom layouts using the "rounding" attribute described here.
Sample Page Layouts
PhotoSheet includes a number of exciting new page layouts, easily found in the layouts list. A few examples are shown below; there are many more included in the software. Click on a thumbnail to see a larger version of any image.

A simple 8x10 page layout. 
An interesting 12x12 page layout. 
An interesting 12x8 page layout with no padding and a few key photos emphasized. 
another 12x8 with small padding and rounding. 

A couple of simple 14x6 page layouts.
These samples show some of the looks you can create with different settings for padding and rounding. Notice how the smaller images become circular with the rounding at its maximum setting!

A 14x12 page layout with no padding. 
A 14x12 page layout with padding and round corners. 
A 14x12 page layout with padding and heavy rounding. 
A 12x12 page layout with its default minimal padding/rounding. 
A 12x12 page layout with padding and square corners. 
A 12x12 page layout with padding and heavy rounding.
I hope you enjoy these creative layout possibilities!


