Mini Photo Albums
Create your own miniature photo album!
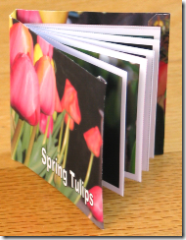
A friend pointed me at this really cool ZoomAlbum system. First you load and arrange your pictures in their software, then use their software to print to their special paper (which has a self-adhesive on the backside, and is also pre-cut), and finally expose the adhesive on the back of their paper and after a little bit of paper folding you end up with a really professional looking bound book. Their system gives you a choice between a linen cover or a photo wrap-around, and the effort required to produce great results is really minor. I decided to try my hand at making one of these little albums. This is basically an accordion book, where one side of the paper is glued to itself. The book pages are strengthened by being formed from a continuous strip of paper, even if the strip does not happen to form a straight line.
I ended up creating a template using Publisher to help me lay out the pictures nice and straight, and also help me track where to cut and where to fold. The following are the steps I use to create a miniature photo album. It's not as fast or easy as with ZoomAlbum's product, but it's cheap and I can use the materials I happen to have on hand. I can also make albums that are 24, 36, or 48 pages using this technique.
Make your own!
Materials you'll need:
- Ruler.
- Stylus for scoring the fold-lines
- Knife or scissors for cutting the paper
- Photos you want in the album
- A little time (It takes me around 30 minutes whip together an album (ZoomAlbum would be a lot faster!)
- Glue suitable for the back of a photo (I used a regular glue stick - test a scrap piece of your photo paper to make sure it'll stick...)
- Photo paper (I'm using "Epson photo quality paper" which was around $16 at Costco for 100 sheets (it's not glossy, but the glue sticks to the back and the low price per sheet keeps me from being scared to experiment with it.)
- Card stock to stiffen the cover (a cereal box will do)
First, make the album pages.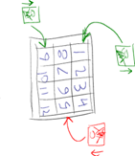
Figure out what pictures to include.
The pages of the album will be square. Use Cropper to extract 1x1 images for the album pages.
Open the template in Publisher. The first page contains the layout for the album pages.
Drag the cropped images (the ones with "1x1" in their filenames) into publisher
Use the drag handles to arrange and resize the images onto the numbered pages. Pay close attention to the orientation of the numbers, and rotate the images (using the green rotate handles) to match the orientation of the numbers.
(If you don't have a copy of Microsoft Publisher, I've included a template for PowerPoint which works almost as easily. If you don't have Office at all, don't worry; I've included an image called "Pages.png" for the template page - just use your favorite photo editor to assemble the page.)
Make the album cover.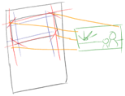
The second page of the publisher template contains the layout for the album cover.
If you want a simple solid cover skip ahead to the next section; you'll use the printed template to cut the linen or other material you want to use for the custom cover.
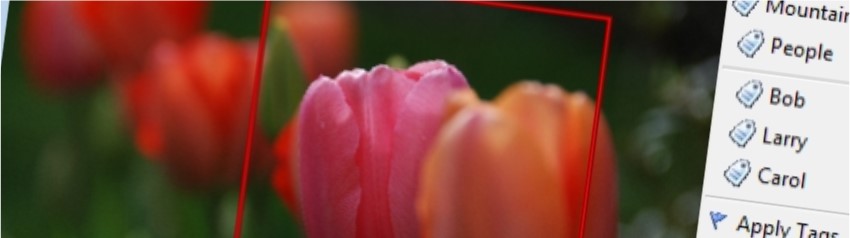
If you want a photo cover, start by picking a picture. Use Cropper to extract the image if you need to: The aspect ratio for the cover doesn't match Cropper's options exactly, but 3x5 is close enough. A good picture will have its content heavily weighted on the right side (corresponding to the front cover).
Drag the cover image into Publisher and position it over the blue rectangle labeled "cover this area with the photo".
(If you don't have a copy of Microsoft Publisher, don't worry; I've included an image called "Cover.png" for the template page - just use your favorite photo editor to assemble the page.)
Print it.
Here you might need to tweak things a little, so try printing in "normal" or "draft" mode to regular paper to make sure things fit as you expect them to. On my old Epson Stylus 870 printer I just needed to set the "advanced" options to include "extended margins". You might need to choose the "fit to page" option.
Score, cut, fold, glue.

Paper folds easily along straight lines once it's been compressed. Grab a ruler and score the "fold here" lines using a stylus (an old dry ballpoint pen, a paperclip, etc) and a bit of pressure.
Use a knife to cut along the red "cut here" lines, paying close attention to the spots where the line goes from red to black (or "cut" to "score").
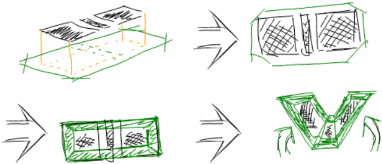
Once the paper is cut, carefully fold along all of the scored lines. When unfolded it should look like the drawing. When folded you should be able to see where you'll be applying the glue.
Start at one end of the strip, apply glue to the back side of one page, carefully line up the neighboring page, and press the page together. Repeat
Prepare the Cover.
As with the album pages, score on the fold lines and cut out the cover.
Follow the template and cut out the cover reinforcements from cardboard (old cereal box works).
Glue the cardstock inside the fold lines. Be sure to leave space between the binding and the front & back (just line up the cardstock with the outside fold line).
Fold and glue the exposed area of the cover over the cardboard
 Assemble the book
Apply glue to the unprinted side of the first and last pages of the album
Lightly position the pages against the "binding" of the cover while you hold the cover almost closed.
Before the glue sets, center the fist and last pages against the cover.
Gently press everything into place, and make sure the pages aren't sticking to each other
That's it!